利用 Nginx_lua 定制高效灵活的专属WAF
0x01 什么是Lua1
2
3关于Lua,就不用多说了吧,想必朋友们应该也都非常熟悉了,众多脚本语言中的一种,不过相对于其它脚本来说,性能要略高一点
在nginx中也提供了一个nginx_lua的模块,主要是为了方便用户,可以灵活的通过lua来扩展nginx功能,比如lua_waf
有兴趣可自行深入了解,这里就不细说了,我们今天的重点主要还是想利用它来快速部署一个简易版的Waf
0x02 这里,我还是拿之前已经编译好的lnmp环境来演示,因为等会儿要重新编译nginx,所以就直接把之前nginx的整个安装目录干掉,因为是源码编译安装的,所以也不会有啥残留[源码编译安装的好处],记得在干掉之前先把nginx服务停掉,配置文件[nginx.conf]也备份一下,方便等会儿再直接拿过来用1
php5.5.38 + mysql-5.5.32 + nginx-1.12.1 + centOS6.8_x64
1 | # pkill nginx |
0x03 准备好所需的所有源码包,注意,这里的nginx尽量先不要用太高的版本,高版本自身还有些问题,在实际编译时错误的解决也比较周折,暂不推荐用1
2
3
4LuaJIT-2.0.5.tar.gz
lua-nginx-module-0.9.13.tar.gz
ngx_devel_kit-0.2.19.tar.gz
nginx-1.8.1.tar.gz
0x04 编译安装 LuaJIT ,lua脚本的解释器,因为这里是64位系统,防止等会儿找不到库,所以就提前把它链到32位的库中1
2
3
4
5
6
7# tar xf LuaJIT-2.0.5.tar.gz
# cd LuaJIT-2.0.5
# make && make install
# ln -s /usr/local/lib/libluajit-5.1.so.2 /lib64/libluajit-5.1.so.2
# echo "LUAJIT_LIB=/usr/local/lib" >> /etc/profile
# echo "LUAJIT_INC=/usr/local/include/luajit-2.0/" >> /etc/profile
# source /etc/profile
0x05 重新编译安装nginx,其实,我自己这里的依赖库本身是不用再装的,因为之前装nginx时已经都装过了,如果你是第一次全新安装nginx,可能还是要装一下1
2
3
4
5
6
7
8
9
10
11
12# wget http://nginx.org/download/nginx-1.8.1.tar.gz
# yum install pcre pcre-devel openssl openssl-devel -y
# useradd -s /sbin/nologin -M nginx
# tar xf ../lua-nginx-module-0.9.16.tar.gz
# tar xf ../ngx_devel_kit-0.2.19.tar.gz
# tar xf nginx-1.8.1.tar.gz
# cd nginx-1.8.1
# ./configure --prefix=/usr/local/nginx-1.8.1 --user=nginx --group=nginx --with-http_ssl_module --with-http_stub_status_module --with-http_gzip_static_module --with-file-aio --with-http_dav_module --add-module=./lua-nginx-module-0.9.16 --add-module=./ngx_devel_kit-0.2.19/
# make && make install
# ln -s /usr/local/nginx-1.8.1/ /usr/local/nginx
# cd /usr/local/nginx/conf/
# mv nginx.conf nginx.conf.bak && egrep -v "^$|#" nginx.conf.bak >> nginx.conf
0x06 重新配置nginx,在nginx中配置文件中加入以下语句,之后重启nginx,主要是为了测试lua是否可用1
2
3
4
5
6
7
8
9
10
11
12
13
14
15
16
17
18
19
20
21# vi /usr/local/nginx/conf/nginx.conf
http {
.....
log_format main '$remote_addr - $remote_user [$time_local] '
' "$request" $request_body $status $body_bytes_sent '
' "$http_referer" "$http_user_agent" "$http_x_forwarded_for" ';
server {
....
location /lua {
default_type 'text/plain';
content_by_lua 'ngx.say("Lua say Hello to you!")';
}
....
}
.....
}
# /usr/local/nginx-1.8.1/sbin/nginx -t
# /usr/local/nginx-1.8.1/sbin/nginx

0x07 在nginx主配置文件中加载lua_waf,具体配置如下1
2
3# git clone https://github.com/loveshell/ngx_lua_waf.git
# cp -r ngx_lua_waf/ /usr/local/nginx/conf/waf
# cd /usr/local/nginx/conf/
1 | # vi nginx.conf |
0x08 编辑waf配置,非常简单,从名字都能看出来是干啥的,非常简单1
# vi /usr/local/nginx/conf/waf/config.lua
1 | RulePath = "/usr/local/nginx/conf/waf/wafconf/" |
1 | # mkdir /usr/local/nginx/logs/hack/ |
0x09 最后,再来看看最核心的地方,规则目录,这里的规则和上面的配置项功能都是一一对应的,还是那句话,这里默认的规则如果实际用当然是远远不够的,不过好在,我们可以直接往里面写正则,这样就显得简单灵活多了1
# ls /usr/local/nginx/conf/waf/wafconf
参数正则,确实太简陋了,不过,好在定制空间非常大,而且lua相对比较简单,花费的时间周期也比较短
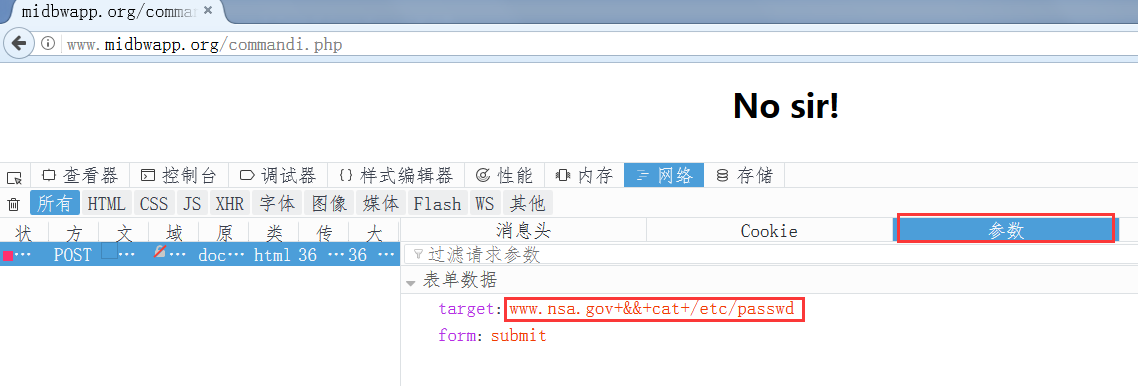
尝试命令执行
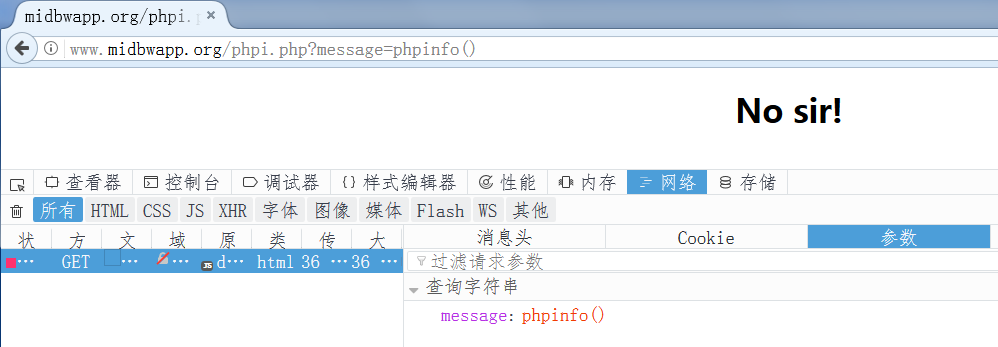
尝试php代码执行
尝试sql注入
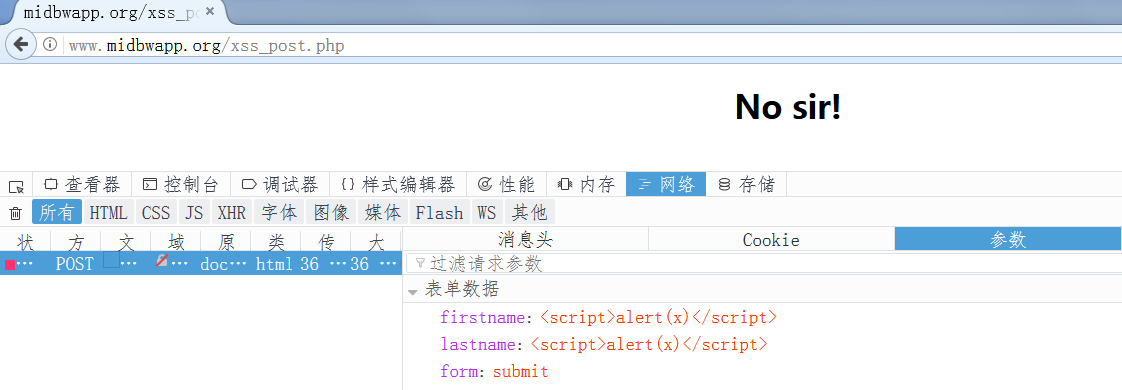
尝试 xss
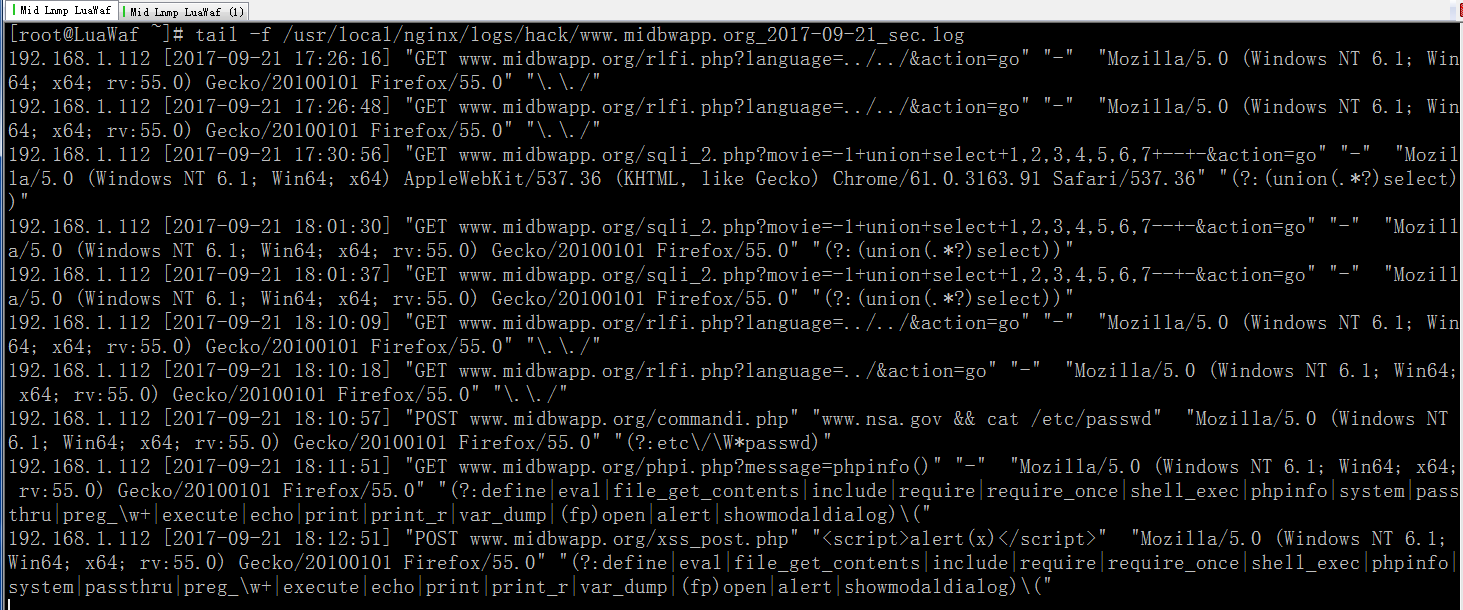
0x10 通过日志观察攻击行为,利用脚本绘制动态图实时显示到前端页面上
0x11 小结:1
部署简单,灵活高效,可扩展性较强,后期会把自己加强版的正则给大家,待续....
